Showing posts with label Baking. Show all posts

Thursday, November 7, 2013

Baking Tip: Avoid having to wash shortening from a measuring cup

Measure shortening without having to wash your cup!

I really don't like washing my measuring cups after I measure out shortening.  I don't think I'm the only one either because Crisco has made easy measure Baking Sticks.  They are convenient for sure, but you pay for it at 70% higher cost of the big tub.  This tip is a cheaper alternative with the same convenience.

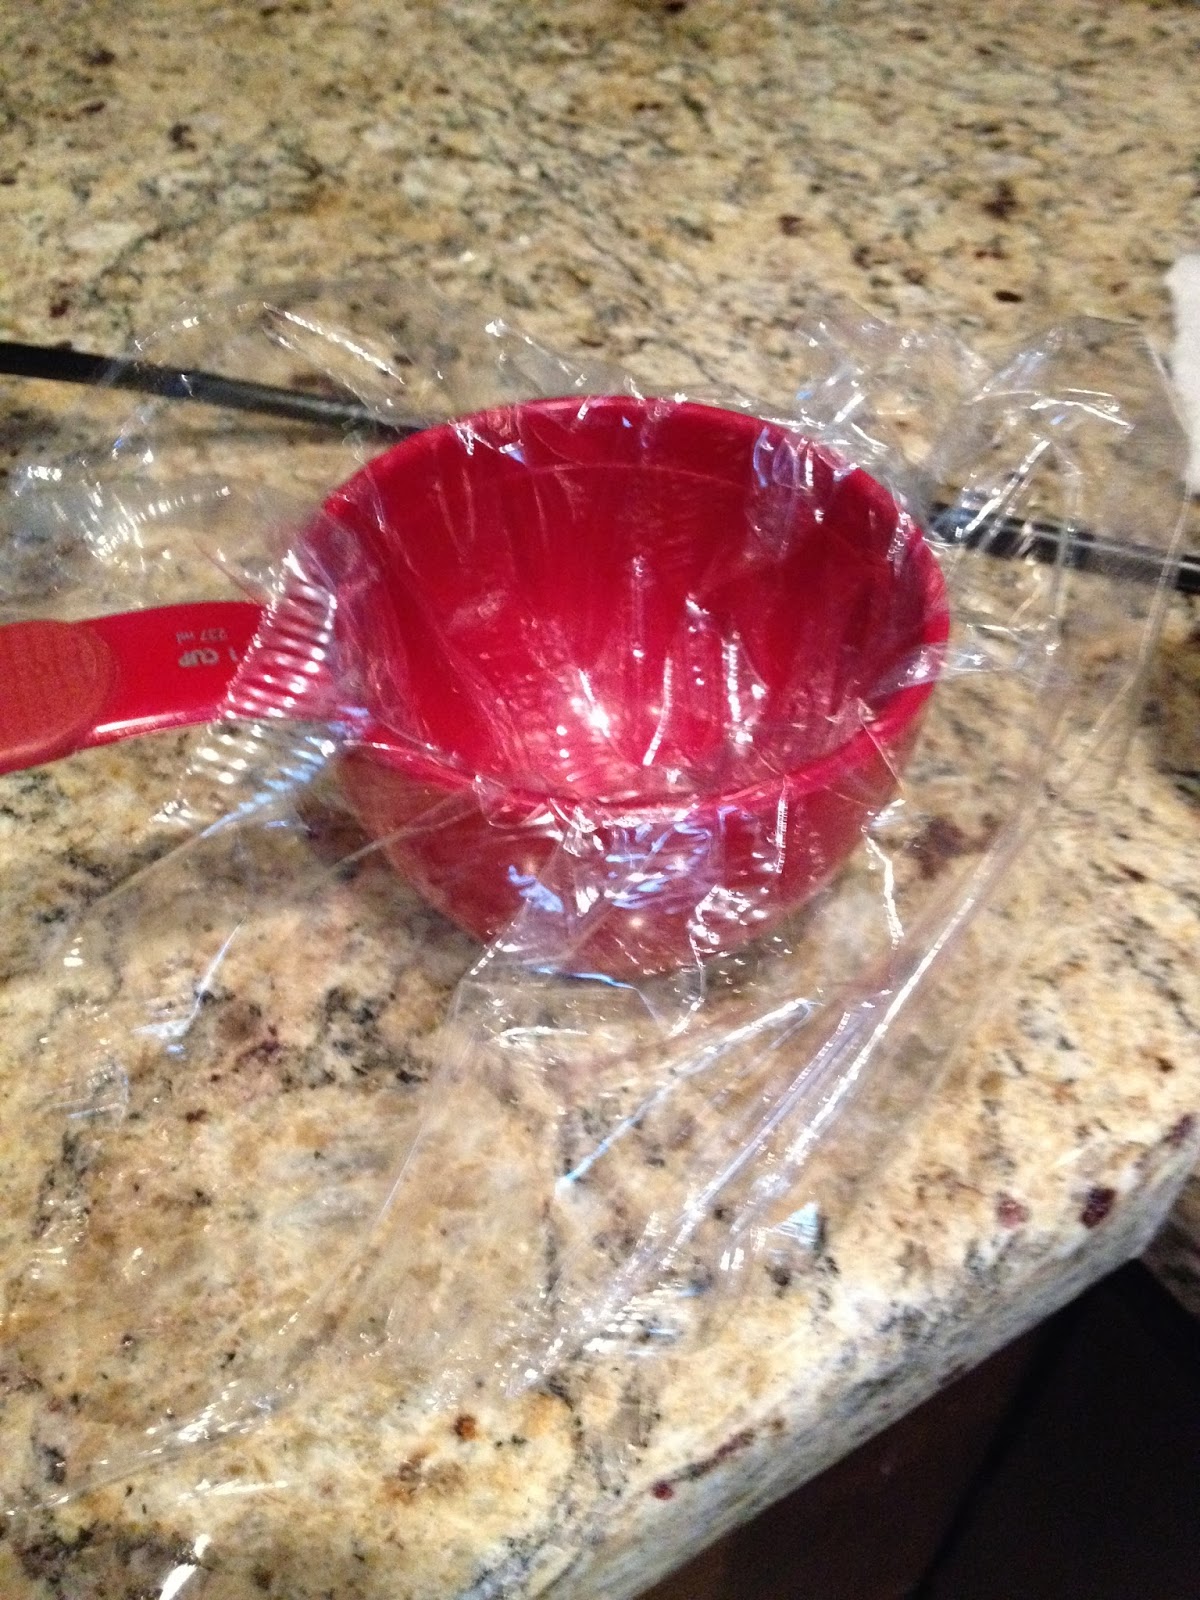
Line a measuring cup with plastic wrap to prevent shortening from sticking
 Line your measuring cup with a small piece of plastic wrap.
Add shortening to the cup
Fill with the amount of shortening you need.  Unfortunately, I did dirty a spatula getting the shortening in the cup, but I use it to clean all the ingredients off of the side of my mixing bowl so I don't really consider that a loss.
Remove the plastic wrap from the cup and the shortening comes too
 Pull up on the plastic wrap to remove the ball of shortening from the measuring cup.
Shortening in mixerPopped right off the plastic wrap

Flip the plastic wrap over into your mixing bowl and the shortening will pop right off.  Easy peasy lemon squeezy!  I love being able to use the same cup to measure the sugar or flour or whatever else I need without having to clean the sticky, slimy shortening off first.  Happy baking!

Monday, April 29, 2013

Cherry Berries on a Cloud


INGREDIENTS

Meringue:
6 egg whites 
1/2 teaspoon cream of tartar 
1/4 teaspoon salt 
1 3/4 cups sugar

Filling: 
2 packages (3 oz each) cream cheese, softened
1 cup sugar
1 teaspoon vanilla
2 cups whipping cream 
2 cups miniature marshmallows

Cherry-Berry Topping: 
1 can (21 oz) cherry pie filling 
1 teaspoon lemon juice 
2 cups sliced strawberries or 1 package (16 oz) frozen strawberries, thawed, drained

Heat oven to 275°F. Grease bottom and sides of 13x9-inch pan. In large bowl, beat egg whites, cream of tartar and salt with electric mixer on high speed until foamy. Beat in 1 3/4 cups sugar, 1 tablespoon at a time; continue beating until stiff and glossy. Do not underbeat. Spread in pan.
Bake 1 hour. Turn off oven; leave meringue in oven with door closed 12 hours.
In large bowl, mix cream cheese, 1 cup sugar and the vanilla until smooth. In chilled medium bowl, beat whipping cream until stiff. Fold whipped cream and marshmallows into cream cheese mixture. Spread evenly over meringue. Refrigerate at least 12 hours but no longer than 24 hours.
In medium bowl, mix all topping ingredients until well blended. Spoon over individual servings of dessert. Store in refrigerator.


From Betty Crocker

Saturday, May 5, 2012

Cinco de Mayo: Tres Leches Sheet Cake


I think this cake is sooo good, mostly because I love milk.  However, it's a little rich for me.  Also, because I'm making it for a crowd, I decided to make this recipe into a sheet cake.

Ingredients:

Cake:
1/2 cup unsalted butter, softened
1 cup granulated sugar
5 large eggs
1 tsp vanilla extract
1 1/2 cups flour
1 1/2 tsp baking powder

Tres Leches Sauce:
1 cup half and half
1 can (14 oz) sweetened condensed milk
1 can (12 oz) evaporated milk

Topping:
2 cups whipping cream
1/3 cup powdered sugar
1 tsp vanilla extract
Strawberries, sliced

Preheat oven to 350 degrees F (I'm a chemist so we have to have our units!).  Cake: In a large mixing bowl, beat butter and sugar until light and fluffy.  Mix in eggs and vanilla.  Gradually add flour and baking powder and mix until combined.  Pour batter into a greased cookie sheet.  The batter will be a little more viscous than most cake batters so you'll have to spread it our evenly, especially if you are making a sheet cake like I did.  Bake at 350 degrees F for 20 minutes or until a toothpick or a fork inserted in the center comes out clean.  Pierce cake all over with fork and allow to cool while you prepare the tres leches sauce.  Sauce: Combine the tres leches (three milks) in a bowl and wisk until well mixed.  Pour evenly over cake, allowing it to soak into the holes you made with the fork.  Cover and refrigerate overnight or at least a few hours.

Before serving, beat whipping cream, powdered sugar, and vanilla at medium-high speed until thick.  Spread over cake.  Top with 1-2 slices of strawberries and serve.


Sunday, June 5, 2011

Chouquettes

This is a very light, basic French Pastery that can be filled, or eaten plain. 

INGREDIENTS:

1/4 cup milk
1/4 cup water
3 1/2 tbsp butter at room temperature
1 1/2 tsp sugar
1/2 tsp salt
3/4 cup all purpose flour
2 large eggs
1/2 cup pearl sugar (buy online or at Ikea)

DIRECTIONS:
Preheat oven to 400F. Line a baking sheet with parchment paper or coat with non-stick cooking spray.  Combine milk, water, butter, sugar and salt in a small saucepan and bring to a boil over medium heat.  Add the flour all at once, stirring vigorously with a wooden spoon until dough comes together in a ball. Continue to cook, stirring continuously, for one minute.  Transfer dough to mixer or clean bowl and let mix at a low speed for 2-3 minutes until slightly cooled. Beat eggs in one at a time, waiting until each egg is fully incorporated to add the next one. Increase mixer speed to medium-high for 1 minute to ensure that batter is very smooth.  Using a spoon, dollup the dough in 1-inch balls onto the cookie sheet.  Sprinkle with pearl sugar.  Bake for about 18-22 minutes, or until golden brown.  Transfer to a wire rack to cool.  If you are going to fill, poke a hole in the side and inject filling.  If eating plain, let cool and eat or cover to store.

Monday, May 30, 2011

Dark Chocolate Raspberry Macarons


Someday, when I perfect my macaron recipe, I will post that on this website.  However, that day is not today.  These macarons are made with the basic almond flour recipe for the cookies with red food coloring.  The filling is dark chocolate ganache with raspberry puree, with a fresh whole raspberry in the center.  So yummy!

Monday, October 11, 2010

Cake Boss Inspired Topsy Turvy Birthday Cake


First of all, everything in this cake was made from scratch.  No cake mix.  No pre-made fondant.  No jug of frosting.  Scratch.  I made 4 batches of cake batter.  It took me forever, but the cake was amazing.  My roommate Alisha Marie Peterson, was turning 22 on October 9th (the same day I ran my first and last marathon).  If any of you don't know Alisha or myself, I would consider us a team of master chefs.  We both thoroughly enjoy making stuff that is ridiculously hard.  When most people would say, "Oh my gosh, someone made that?  I could never do that."  Alisha and I both look at each other and say, "We could easily make that.  We have no training whatsoever and have never even seen it in real life, but we can make it better than the first guy by changing up this or that.  It's going to be so awesome!!!"

Well, we have been watching season one of Cake Boss on Netflix and decided that we would make a cake like that someday.  Then the thought popped into my head.  Holy Crap!  It's going to be Alisha's birthday.  We decided that it was a great idea, and started planning.  I researched all of the cakes that were actually on the show.  Here is the website.  http://carlosbakery.com/  I sent Alisha every picture of cake I could find that was at least 3 tiered.  We went through several ideas.  One of our earliest ideas involved smoke coming out the top, but I was having a hard time figuring out how to decorate the rest of the cake.  What goes with smoke?  A cigarette?  A fire?  A cauldron?  (I secretly wanted a Halloween cake but that was vetoed more than once.)  We X'ed that idea along with a beach cake (it's October) and gum-pasted flowers (Come on, I had a marathon in which to prepare.  I couldn't waste all of my free time with this.  Baby steps.  Save something for next time.)  Our final conclusion, a Topsy Turvy cake.  After more online research, I found this link that teaches you how to make a Topsy Turvy cake.  http://cakecentral.com/articles/6/how-to-make-a-topsy-turvy-whimsical-cake  The directions were very straight-forward and easy to follow.  Alisha decided that she wanted a chocolate and vanilla cake with cream puff frosting and fondant.  I have used fondant before.  (Shelby, my littlest sister, and I made cupcakes with black and white circle-y modern art looking fondant when we were on our cupcake kick last year.)  From my experience, it tastes gross and is a pain in my keister.  I did not want to do it.  Also, it's expensive!  Well, I did some more research online and found this little jewel.  http://whatscookingamerica.net/PegW/Fondant.htm  Marshmallow fondant!  I couldn't see anything is this three ingredient recipe that looked gross or difficult or expensive, so I decided to give fondant another try.  I gave Alisha her assignment.  Figure out what kind of decoration she wanted and to make ame a shopping list.  Several days later, we had an idea and a rough sketch.  Alisha photoshopped some different colors on a cake that we liked the design of and we ultimately brought this cake to life.  It contains:
Alternating chocolate and vanilla layers of cake with cream puff filling, covered with buttercream icing and a layer of marshmallow fondant.  Decorated with fondant attached with buttercream icing.  Everyone loved it, especially Alisha.